Sunday, September 29, 2013

24 hour extreme nursery makeover

My daughter Jenny is about to have her 5th baby (a boy) - and little baby Cohen has decided he likes sitting breech. Jenny is little and Cohen is big so she's been terribly uncomfortable. To cheer her up, I decided to organize an extreme nursery makeover/baby shower. So family members gathered at her house last week and we had fun!

The baby's room was in pretty rough shape with layers and layers of wallpaper. Months ago, Jenny and her boys stripped the wall paper. The room needed a makeover!


Earlier, Jenny had pinned some of her favorite nurseries. She likes a kind of woodland style. I used these pictures as inspiration:


First thing - I went shopping and found this scary rocking chair at a thrift shop ($30)


Everyone that saw it wondered what I was thinking - but I could just see it as the focal point of the nursery. So - off to Ikea to find fabric to recover the cushions - and to pick up odds and ends for the nursery.

I have a collection of Annie Sloan's Chalk paint  colors so I used them to paint the old chair Emerald Green (just happens to be the Pantone 2013 color of the year). I mixed equal parts Antibes Green and Provence to create the color.

Ta da!


I found the little deer in the Christmas department at Ikea.

And Ikea had the perfect fabric to recover the cushions - a nice black and white stripe.

Looks a little better, doesn't it?


Lisa had the brilliant idea to accent the woodland nursery with branches - to hang the curtains and to create a mobile. She found and cut the sticks, and made little clouds out of cut paper.

Last Thursday night, we loaded up the truck and drove to Jenny's for the big makeover surprise. She couldn't believe the funny/cute green chair.

We divided up and set to work painting the room and furniture.

Lisa and Jenny painted three walls light gray (Valspar Sea Salt Blue CI 191) and the accent wall behind the crib a soft blue (Eddie Bauer Wave EB7-3).

I painted an old crib white using Annie Sloan Pure White chalk paint. I love most of the chalk paint colors but I find the whites difficult to use. They don't seem to cover very well. I did three coats on the dark wood crib and it still looked streaky.


I ended up running out of paint before it looked good - what to do? I decided to embrace the streakiness and dry brush it with gray. It gave the finish a kind of woodsy feel.


 (silly) Jamie and Karenin assembled the cloud mobile - it's perfect! Lisa used this YouTube tutorial to make the clouds.


Reid and Jenny painted an old Ikea dresser white with gray drawer fronts


Jason hung Ikea curtains on our tree branch curtain rod   (brackets from Lowes)


Jenny had this cute teepee from a Taylor Joelle photo-shoot (her clothing company) - a perfect little accent. The mommy and baby foxes are from Ikea.


The shelf and changing pad are from Ikea. Jenny already had the perfect black and white houndstooth rug and the fun arrow and teepee artwork - made from purchased Shutterstock photos and printed on canvas.


That ugly old chair just made the nursery! The side table and floor lamp are Ikea


And I made this little print on my iPad - it looks good in a black Ikea frame.


 Here is Cohen's room - all put together (except for the crib which still needs a few repairs).


We can't wait to meet you - baby Cohen!

Monday, September 16, 2013

Bullet Journal


I'm trying out a new organizing, journaling, to-do list system - and so far I really like it.

It's easy, quick, cheap, and flexible.

All you need is some kind of book or journal (the creator likes the large squared page Moleskin).

Here's an overview of the system


 Find more details on the Bullet Journal website

Wednesday, August 28, 2013

Wall art makeover

Do you have old, dated wall art laying around?

I do - and my daughter needed an art piece for her dining room. 

So I gave it a make-over

from this

to this

How? - I took it apart, removed the print, flipped it over, and painted this floral on the back. Then I painted the old frame and put it all back together again.

What if you don't paint? 

Here are some easy ideas for DIY wall art:

Paint the back of the old print a solid color and then cut and arrange paper triangles - idea from Lia Griffith

Here's a tutorial using paint chips by Sutton Grace 

or try circles - idea from Design Sponge

or just cover the old print with fabric

Of course this would work with inexpensive new frames as well 

So many possibilities...

Sunday, May 5, 2013

I have a plan


A wonderful group of women recently organized an event for our daughters and granddaughters. As part of our experiences together, we learned about creating our own plan of salvation - in a visual form. This is something that will help us understand how all parts of the gospel fit together and will, hopefully, motivate us to continue pressing forward on the path to exaltation.

Here's my version - still in process because I keep thinking of more scriptures to add.

In my plan, I visualize mortality as a time of progression in gaining light, truth, and glory - "growing brighter and brighter until the perfect day."


The plan is made from file folders taped together with library tape.

I added paint, ribbon, ink, stamps, images, tape, and embellishments


Glory!


Sunday, April 21, 2013

Clyde Bags - our family company


We are an entrepreneurial family. Most of our children have multiple businesses.

Here are links to a few:


Our newest family business is Clyde Bags.

Our first product - the obsessively organized, iPad purse is now available!

The Clyde iPad purse is a satchel style bag in two color versions - bright red and turquoise.

The lining is a gorgeous vintage typewriter print from London designer, Rachel Cave.


Important features:

  • top quality, weather resistant polyurethane exterior (looks fantastic, lasts forever)
  • fur lined zip pocket on the back of the bag - sized perfectly for an iPad or other similar sized tablet
  • easy access back zip pocket with iphone sleeve and space for other frequently used items
  • adjustable shoulder strap and convenient 'grab' handle
  • two compartment interior
  • kindle or small tablet pocket
  • private interior zip pocket
  • additional interior pockets
  • key hook


Wednesday, April 10, 2013

Mixed media with friends


Aren't these the cutest paintings?

A few fun Featherstones came over today. We made a glorious mess in my kitchen, dragging out all kinds of supplies and I had a wonderfully creative blast for a few hours.


We used:

printed papers
dictionary pages
gel medium
acrylic paints
spray ink
masks
rub ons
etc.


Here are some of my sources for supplies and inspiration:

I collect ideas on my Pinterest mixed media board

My daughter and I took a wonderful online "She Art" class from Christy Tomlinson a few years ago - I learned a lot. I know she's offering a few different classes right now.

I just found Kelly Rae Roberts' blog a few days ago. I love the words she uses on her paintings. Take a look at her gallery for some great inspiration.

For supplies:

Archivers

Joann's 

Scarlet Lime

and second hand shops, antique shops, yard sales,  grandma's basement....

Monday, February 18, 2013

Julia turned 16 - so I made her a book

I love all kinds of mixed media art, but lately I'm slightly obsessed by making books. I've made 5 or 6 this past year.

My most recent handmade book project was for my granddaughter Julia, who turned 16 in January. I wanted hers to be feminine with a vintage flair.

Here's my process:

I started with a good quality heavy weight "toothy" paper. I used Mohawk via felt cool white 80 lb cover paper. But any heavy weight paper or cardstock will work.

Next comes paint. I picked a simple color scheme:

Image

Then I applied acrylic craft paints. Sometimes I squirt paint directly onto the paper and drag it with a plastic card.

This time I squirted and then brushed with a wet brush to give a modulated surface:

Image

I like an interesting background so I sprayed inks through masks, added papers using gel medium (like modpodge) and then stamped with some white paint.

Image

Image

Image

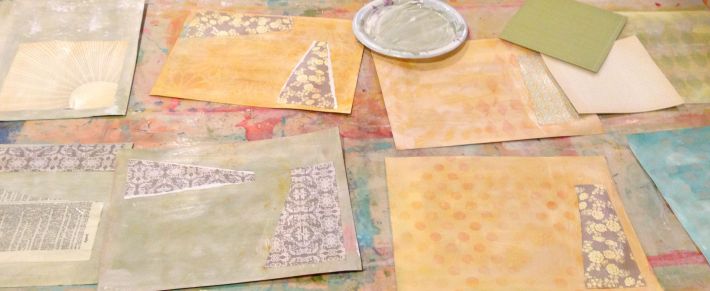
The colors turned out a little too bright for Julia's style, so I "frosted" them by painting a diluted layer of gray or white paint over the pages.

Image

Finished backgrounds:

Image

Shaping the pages -  I used an old book kit I bought, along with some of my own ideas to cut the edges into fun shapes. Then I punched holes so I can bind the book with rings.

Image

I trimmed the pages to make graduated sizes.

Image

and then distressed and inked the edges.  You can distress by scraping the edges with a scissor blade or a distress tool.

IMG_0227

At this point, I had a nice blank book, ready to fill with photos.

I like to create fun ways to display multiple photos by folding paper, making pockets, etc. Here are some ideas:

The photos on this page unclip and open out

Image

Image

Julia trading cards?

IMG_0267


IMG_0266

IMG_0260

These pictures flip down

IMG_0261


IMG_0259


IMG_0251

IMG_0258

Embellish, embellish, embellish

IMG_0276

IMG_0274

The finished book - happy 16th Julia!

IMG_0285

  Exciting Travel Opportunities in 2025! We are thrilled to announce our upcoming tours for 2025, and we invite you to join us for unforgett...