My most recent handmade book project was for my granddaughter Julia, who turned 16 in January. I wanted hers to be feminine with a vintage flair.
Here's my process:
I started with a good quality heavy weight "toothy" paper. I used Mohawk via felt cool white 80 lb cover paper. But any heavy weight paper or cardstock will work.
Next comes paint. I picked a simple color scheme:

Then I applied acrylic craft paints. Sometimes I squirt paint directly onto the paper and drag it with a plastic card.
This time I squirted and then brushed with a wet brush to give a modulated surface:

I like an interesting background so I sprayed inks through masks, added papers using gel medium (like modpodge) and then stamped with some white paint.


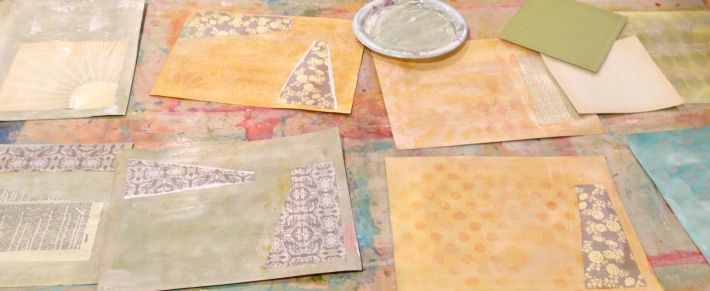
The colors turned out a little too bright for Julia's style, so I "frosted" them by painting a diluted layer of gray or white paint over the pages.

Finished backgrounds:

Shaping the pages - I used an old book kit I bought, along with some of my own ideas to cut the edges into fun shapes. Then I punched holes so I can bind the book with rings.

I trimmed the pages to make graduated sizes.

and then distressed and inked the edges. You can distress by scraping the edges with a scissor blade or a distress tool.

At this point, I had a nice blank book, ready to fill with photos.
I like to create fun ways to display multiple photos by folding paper, making pockets, etc. Here are some ideas:
The photos on this page unclip and open out


Julia trading cards?


These pictures flip down


Embellish, embellish, embellish


The finished book - happy 16th Julia!


